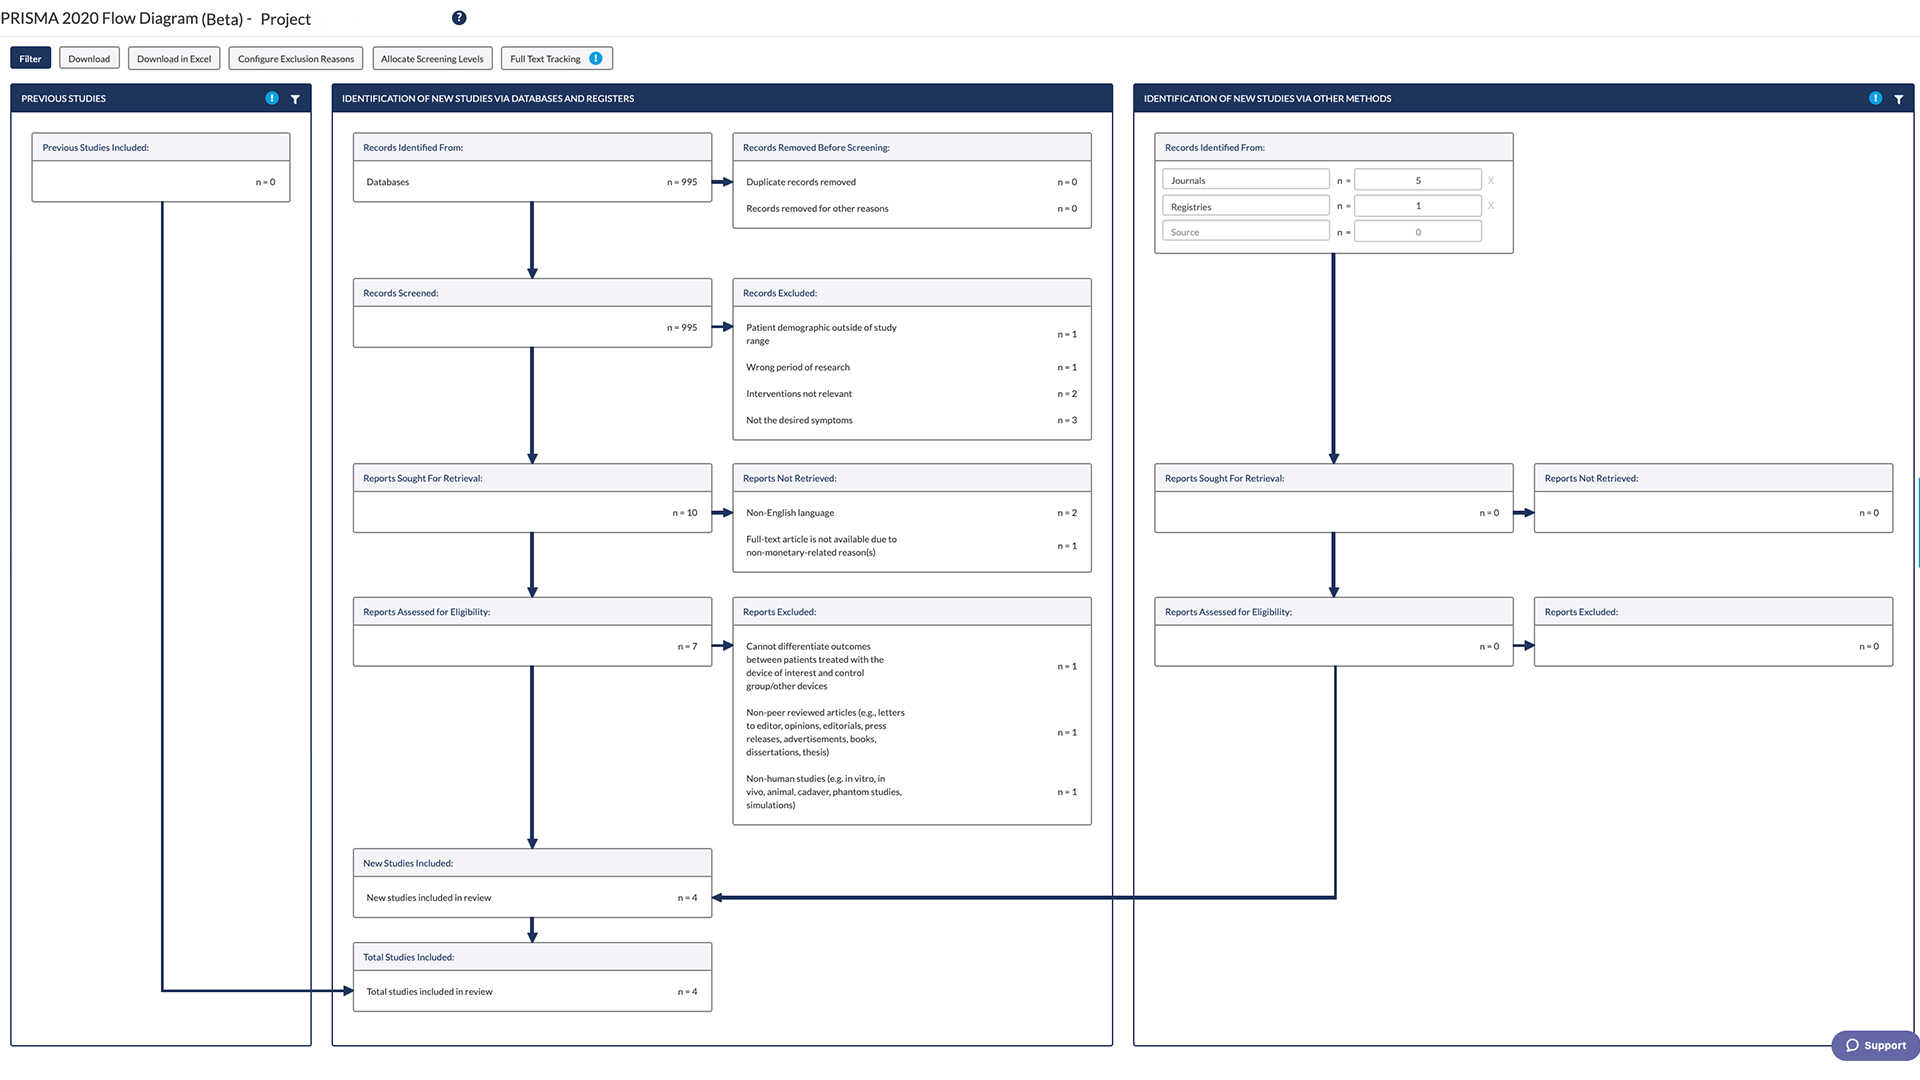
How to Do a PRISMA Flowchart


Automate every stage of your literature review to produce evidence-based research faster and more accurately.
The flowchart provided by Preferred Reporting Items for Systematic reviews and Meta-Analyses (PRISMA) is the gold standard that is widely accepted in the sciences. The PRISMA flowchart is a type of diagram that is a visual representation of the process of compiling and reporting on data collected, assessments of this information, and how the information was used. PRISMA flowcharts are used across a variety of studies, such as those done in the field of evidence-based medicine.
The flowchart also summarizes the reference study section and the exclusion of studies not relevant to a specific topic; it is also frequently part of the PRISMA statement.
A Quick Look at the PRISMA Flowchart
There are two main components of a PRISMA systematic review: a checklist of the items and a flow diagram.
The 27-item checklist includes the title, summary, methods, results, discussion, and funding of studies sections. The flow diagram is the final meta-analysis-based representation of the reporting standards.
The PRISMA flowchart is a visualization used to describe the structure of systematic reviews and meta-analyses. It describes the evidence-backed details of the research in such a way that all readers fully understand the basis of the research and the review.
Why Use a Prisma Flowchart?
Systematic reviewers use PRISMA diagrams as a means of enhancing the value of the reviews. Along with the checklists, the diagrams aid authors in the process of reporting and provide evidence to readers at a high level of reliability and transparency. When readers reference the reviews and the meta-analyses, they can be confident about the quality of reports that align and comply with a PRISMA review.
PRISMA flowcharts offer easily accessible summaries of results from systematic reviews and meta-analyses, ie, the best research available. Providing access to verified and accurate research results is particularly important in healthcare because these data can have a direct impact on people’s health.
Creating a PRISMA Flowchart
Before getting started, you might want to look at a PRISMA Checklist example to get a sense of the type of information that will be included in a flowchart. Make sure that you also know exactly what is new in PRISMA 2020, because the PRISMA guidelines underwent a major update at that time.
When creating a PRISMA flowchart to represent the data collection and analysis used in a research report, track the following steps taken during your review or analysis.
- Adequate preparation: Choose and download an editable flowchart template that is suitable for the research being reviewed.
- Database search: Search for the terms within the individual studies. Include all of the reviews from these searches and those found on related topics; you can also apply search strategy criteria to filter results, such as the year or language, for better results.
- Remove all duplicates: Check and delete any duplicate reports, data, studies, or other information extracted during a search.
- Screen records: After removing any duplicates, go through the remaining records and identify the studies that best match the research topic.
- Exclude records that don’t fit: After selecting the records you want to use to answer your primary research question, identify the ones that you will not be using and explain why they are not a good match.
- Reports for retrieval: List the reports that you will assess for eligibility.
- Reports not retrieved: If you cannot find the full manuscripts for any of the articles or information you selected, list them here.
- Assessed for eligible reports: After you have the full content for all of the manuscripts you can find related to your topic, go through them carefully. Identify the reports you have reviewed in their entirety.
- Reports excluded: After reading the full text, you may find that some of the sources weren’t what you were expecting or needed. If that happens, identify which reports were excluded at this point of the review process. Enter the number of excluded reports in the box.
- Included studies: After weeding through all of the reports that were initially found, you will have studies that have the valuable data and information you need for your own research. This is where you identify which studies you plan to leverage in your work.
Learn More About DistillerSR
(Article continues below)
Moving Forward
By mastering how to create a PRISMA flowchart, you are providing future readers and reviewers with a quality visualization that will support future scientific advances and innovation.


